
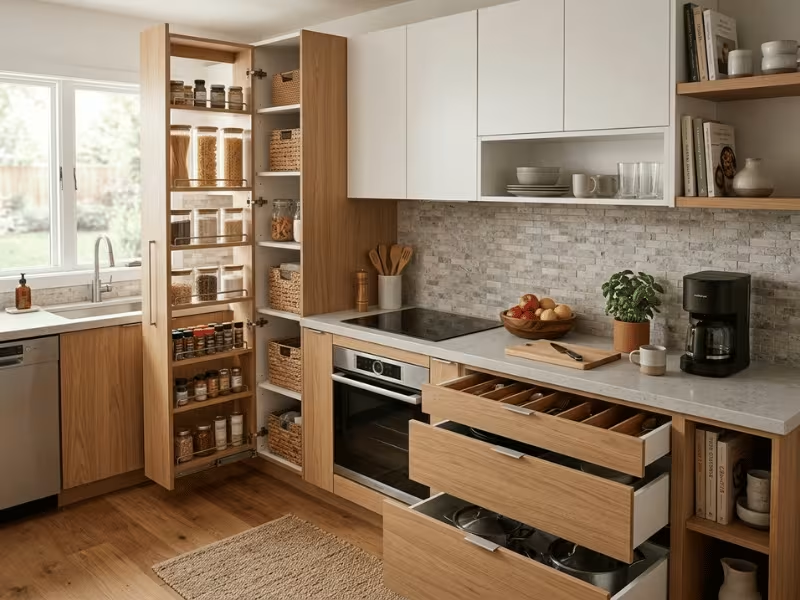
Many kitchens feel too small. But the real problem is often storage, not size.
I see this in homes where cabinets feel full, counters stay messy, and the pantry gets harder to manage each month. The space exists. It just does not work well.
In this guide, I will show you how to spot wasted space, organize the kitchen by zone, and choose storage that truly fits. That way, you can store more without making the kitchen feel crowded.
Why Most Kitchens Feel Short on Storage
Most people blame the size of their kitchen. In my experience, size is rarely the real issue. The space is there. It just sits unused.
Look up first. Tall cabinets often hold one shelf of items and a big pocket of empty air above them. That wasted height could double your capacity with nothing more than a riser or an extra shelf.
Then look deep. Base cabinets run far back, but most people only use the front few inches. Everything behind turns into a dead zone where pots and lids disappear for months.
Corners waste space too. An L-shaped cabinet swallows items into a spot your arm can’t reach, so half of it goes to nothing.
The next problem has nothing to do with square footage at all. It’s grouping. When baking gear, snacks, and pans all mix on one shelf, the kitchen feels chaotic even when there’s room to spare. Your eye reads the mess as “full.”
Here’s the mistake I see most: people buy organizers to fix all this before they measure a single cabinet. The bins don’t fit, they crowd the space, and the clutter gets worse.
So let me say it plainly. Clutter is usually a layout problem, not an item-count problem. You don’t need a bigger kitchen. You need to use the one you have.
Once you see your space this way, the fixes get simple, and you stop wishing for square footage you don’t need.
Before You Buy Anything, Diagnose the Storage Problem
Grab a bin at the store, bring it home, and you often make the mess worse. Fix the problem first, then buy. Start by matching what you notice to what it actually means.
|
Problem you notice |
What it usually means |
What to fix first |
|---|---|---|
|
Cabinets look full but feel empty inside |
Wasted height above the shelf |
Add a riser or second shelf |
|
Pots vanish and never come back |
Wasted depth at the back |
Pull items forward |
|
You reach or crouch for daily items |
Wasted access in prime spots |
Move top-use items to eye level |
|
You dig to find anything |
Wasted visibility |
Switch to clear, grouped bins |
Wasted height
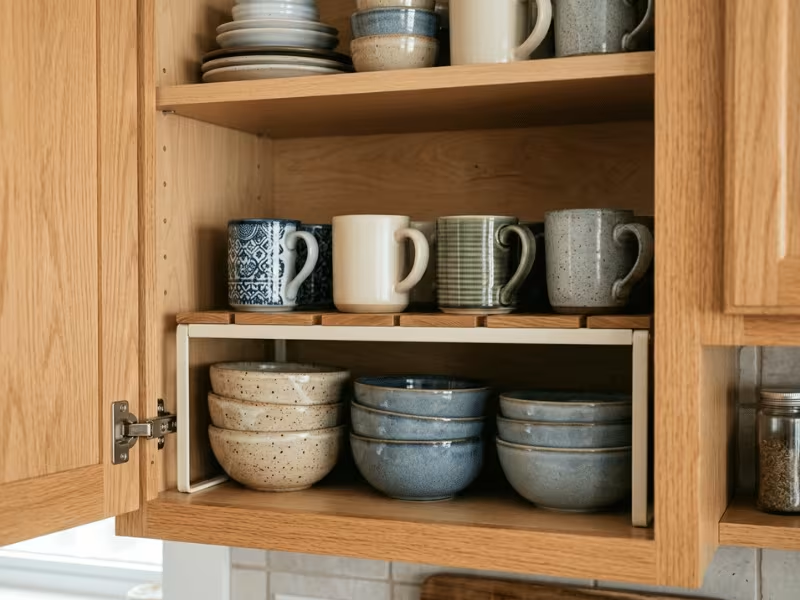
Open a tall cabinet and you often see one shelf of mugs with a big pocket of air above. That gap is free storage. A riser or an extra adjustable shelf turns one layer into two, and your capacity jumps without buying more cabinets.
Wasted depth
Base cabinets run deep, yet most people use only the front few inches. Everything behind slides into a black hole. That’s where lids, pots, and one lonely appliance go to hide for months. The fix isn’t more shelving. It’s bringing the back forward with a pull-out or sliding basket.
Wasted access
Look at what sits in your best spots, right at eye level and easy reach. If that space holds a fondue set you use once a year, you’ve wasted it. Meanwhile, your daily plates sit up high or way down low. Swap them. Prime space belongs to prime items.
Wasted visibility
Opaque bins and tall stacks hide what you own. You forget the second bag of flour, so you buy a third. When categories blur together, your eye reads the whole kitchen as cluttered. Clear containers and grouped items fix this fast, often before you add anything new.
Run a quick audit first
Before you spend a cent, do this:
- Empty one cabinet completely. Seeing bare shelves tells you the truth about the space.
- Group items by use, not by size. Baking together, everyday dishes together.
- Note what you touch daily. Those items earn the easiest spots.
- Measure width, depth, and height, plus door clearance, and write it down.
Now you know what your kitchen actually needs. Shop with those numbers in hand, and every piece you buy will fit and earn its place.
Plan the Kitchen by Zone, Not as One Big Room
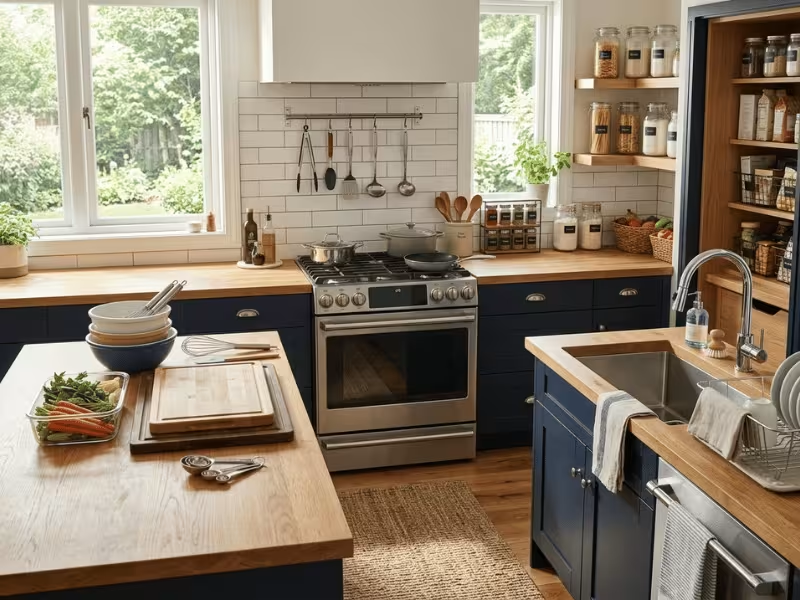
Stop treating your kitchen as one big storage box. Break it into zones built around what you actually do there, and every item finds a logical home.
I plan four zones in almost every kitchen I work on. Each one has a job, and each one earns its own storage rules.
|
Zone |
What belongs there |
Best storage priority |
|---|---|---|
|
Cooking zone |
Oils, spices, pots, pans, cooking utensils |
Keep daily items within arm’s reach of the stove |
|
Prep zone |
Cutting boards, knives, mixing bowls, measuring tools |
Clear counter space plus drawers close by |
|
Cleaning zone |
Dish soap, sponges, towels, drying rack |
Store under and beside the sink |
|
Food storage zone |
Pantry staples, backup items, small appliances |
Group by category; height and depth are fine here |
Set up each zone around how you move
The cooking zone sits at your stove. This is prime real estate, so guard it. Keep the oils, salt, and cooking spoons you grab every day right here. Push the rarely used gear somewhere else.
Your prep zone needs open counter more than it needs stored items. Keep the surface clear for chopping and mixing. Then store knives, boards, and bowls in the drawers and cabinets right beside it, not across the room.
The cleaning zone hugs the sink. Sponges, soap, and brushes belong underneath. Towels and a drying rack stay within reach. You don’t want to walk anywhere with wet hands.
The food storage zone can sit farther out. Pantry staples and backup items don’t need eye-level spots, so this is where higher shelves and deeper cabinets shine.
Let frequency decide placement
Once your zones are set, sort by how often you reach for things.
- Daily items go at eye level. Plates, everyday glasses, and your go-to pan.
- Weekly items go higher or lower. The mixer, the big stockpot, the serving platters.
- Monthly or seasonal items go in the hard spots. Top shelves, back corners, deep cabinets.
This one habit changes everything. When your most-used items sit in the easiest spots, the kitchen feels twice as roomy, even though you added nothing.
Build your zones first, then place items by frequency inside each one. That order keeps the whole kitchen working the way you actually cook.
The Best Storage Fixes for Upper Cabinets and Walls
Upper cabinets and walls hold your biggest untapped storage. The trick is using that height without making things harder to reach. More storage should never mean more digging.
Add a second level before you buy more containers
Before you shop for a single bin, look at the empty air inside your cabinets. Most upper shelves waste half their height. A single layer of mugs sits below a foot of nothing.
Fill that gap with a shelf riser. It splits one shelf into two, so bowls sit above plates instead of stacking into a wobbly tower. Now you grab the top plate without lifting the whole pile.
Adjustable shelves work even better if your cabinet allows them. Slide a shelf in wherever you see a gap over ten inches. Stackable layers do the same job for mugs, cups, and small dishes.
Add the level first. Then decide if you even need containers at all.
Store flat items on their side
Flat items are the sneakiest space wasters. Sheet pans, cutting boards, and baking trays stack into a heavy pile, and you have to lift five to reach the one at the bottom.
Stand them up instead. A vertical divider turns that awkward stack into a filing system. Each pan gets its own slot, so you pull one out with one hand. A matching set from a good tray series makes this even easier, since uniform sizes slot in neatly and stay tidy.
Lids cause the same headache. A lid rack, mounted inside a cabinet or on the door, keeps them upright and stops them sliding into a clattering heap.
This one change often frees up a whole shelf you thought was full.
Use doors and walls with a light touch
Once your cabinets work well, doors and walls give you a bonus round of storage. But treat them carefully, because they punish overloading.
Inside-door racks hold spices, foil, and wraps beautifully. Rails with hooks keep utensils and mugs within reach. Magnetic strips grip knives and measuring spoons right where you work.
Here’s my one rule for door and wall storage: keep it light and frequent. Hang only the items you use often and that won’t strain the hardware.
Load a cabinet door with heavy cookware, and the hinges loosen within months. Then the door sags, and the fix costs more than the storage saved.
Use height to add capacity, not frustration. When every item stays easy to grab, your kitchen feels bigger without a single new cabinet.
How to Make Lower Cabinets and Deep Drawers Easier to Use
Lower cabinets swallow more space than any other part of a kitchen. The storage is there. You just can’t reach it. Deep storage fails when access fails, so every fix below is about pulling things toward you, not cramming them further in.
Pull items forward instead of stacking them deeper
Get on your knees in front of a deep base cabinet and you’ll see the problem. You reach past the front row, dig for a pot in the dark, and knock over three lids doing it.
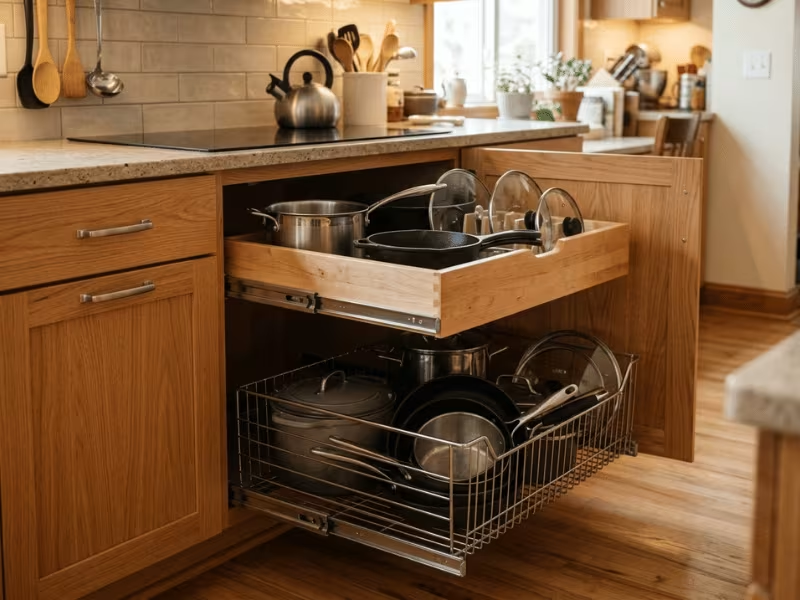
Bring the back forward instead. Pull-out drawers slide the whole shelf out to meet you, so you see everything at once. No more crouching and reaching.
Sliding baskets do the same for pots, lids, and bulky appliances. And a two-tier pull-out uses the full height of the cabinet, not just the front strip of the bottom shelf.
Give every drawer a fixed job
An open drawer with no system turns into a pile. Utensils tangle, gadgets slide around, and you paw through the mess every time you cook.
Dividers stop that. They lock each item into a fixed spot, so your hand goes straight to the whisk without looking. Expandable ones adjust to the drawer width, which helps if your inventory shifts.
For plates and bowls, a peg insert holds them upright. You lift one out with one hand instead of unstacking a heavy tower. That one-hand test is my rule for any drawer: if you need two hands to reach something, the setup is working against you.
Solve corners with movement, not more containers
Corner cabinets are the worst offenders. Push a bin into that dead space and half of it disappears where your arm can’t follow.
The answer is movement, not storage. A two-tier lazy Susan spins the back around to the front, so a small turn brings everything into reach. Nothing hides in the corner anymore.
For L-shaped cabinets, a pie-cut or kidney-shaped carousel fits the odd angle and rotates the same way. A pull-out corner rack swings the whole shelf out toward you, then folds back in.
Each one shares the same logic: it moves the food to your hand instead of forcing your hand into the dark.
Fix access first, and your lower cabinets suddenly hold far more than you thought.
Countertops, Pantry, and Under-Sink Space Need Different Rules
These three spots cause the most daily friction in a kitchen. Each one fails for a different reason, so a single fix won’t cover all three. Treat them by their own rules, and each one starts working for you.
Countertops should support work, not hold overflow
Your counter is a workspace first. The moment it fills with stuff, you lose the room to actually cook.
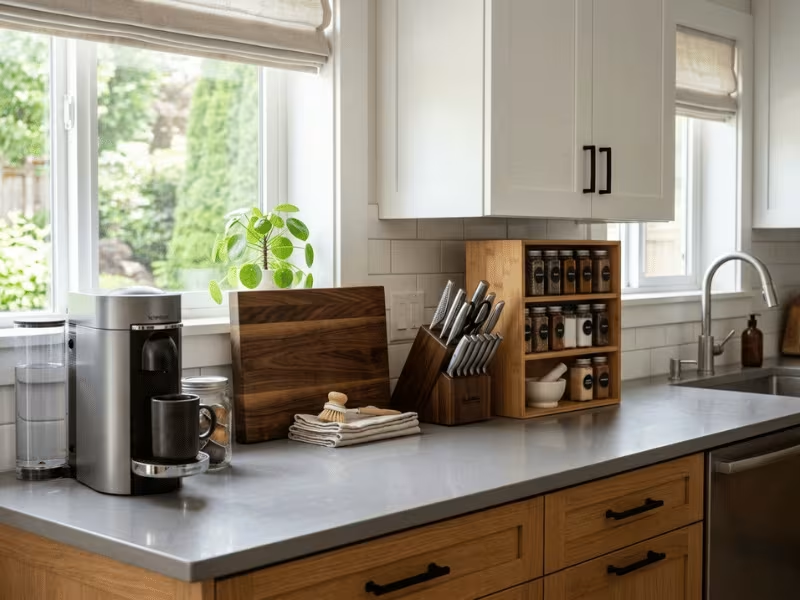
So keep only your top-use items out. The coffee maker, a knife block, maybe a cutting board. Everything else goes into a cabinet.
An appliance garage helps here. It hides the toaster, blender, and mixer behind a small door while keeping them plugged in and ready. You get the convenience without the clutter.
For the few things you leave out, go vertical. A small tiered rack holds oils or spices in one tight footprint instead of spreading them across the surface.
Guard your open counter like it’s the most valuable space in the kitchen, because it is. The more you protect it, the more the whole room works.
Pantry storage works best when you can see everything
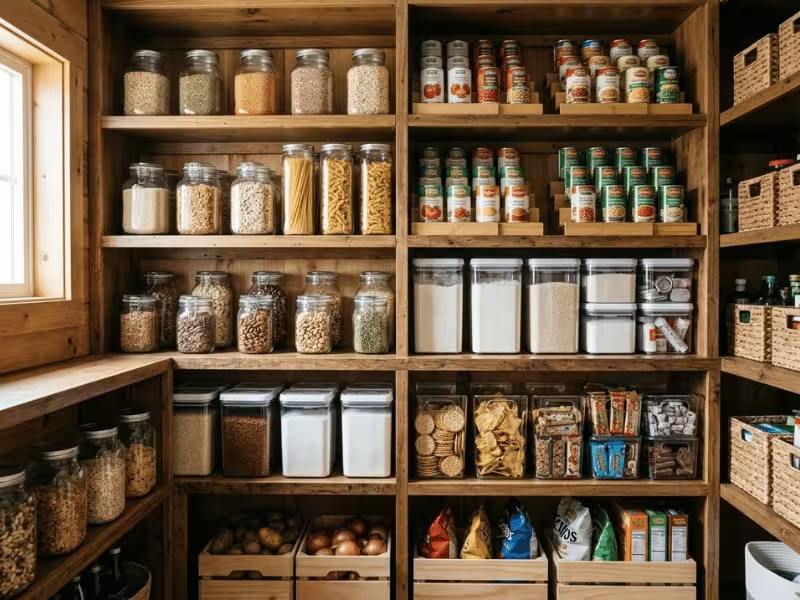
A pantry fails when it turns into a wall of mystery. You buy a third bag of rice because the first two hid behind the cereal.
Fix that with clear containers. When you see levels at a glance, you stop overbuying and stop wasting food. Match the container to what you store, and everything stacks evenly.
Group by use, too. Keep baking items together, snacks together, cans together. Your eye finds the right zone instantly. For staples like grains, flour, and dried goods, a woodenware series container or tray keeps the shelf looking clean while holding weight without bending.
Cans stack into messy piles, so put them on a tiered riser. Now they sit in rows, and you read every label without digging.
One more rule I follow: heavy items go at waist level. Flour, oil, and big jars belong where you lift them safely, not overhead or on the floor.
Under-sink storage has to work around obstacles
This is the trickiest zone because the drain pipe sits right in the middle of it. Fixed shelves never fit around it, so most people just pile things on the floor of the cabinet.
Work around the pipe instead of fighting it. A sliding tier splits into two pieces that slot on either side of the drain. You pull each half out to see what’s back there.
Caddies help too. A pull-down bin or a tension rod holds spray bottles by the neck, which frees up the floor space below.
Small door bins handle sponges and cloths, keeping them off the damp cabinet base.
If kids or pets share your home, add one more step. Move cleaners and chemicals into their own caddy, then set it high or behind a childproof latch. Under-sink convenience is never worth the risk.
Sort these three zones by their own logic, and the friction that slowed you down every day quietly disappears.
Match Storage Solutions to Your Kitchen Layout
Your kitchen’s shape decides where storage struggles most. A galley kitchen wastes space in a totally different way than an open-plan one. Match your fix to your layout, and you stop guessing.
|
Kitchen layout |
Main storage problem |
Best solution type |
|---|---|---|
|
Galley kitchen |
No room to expand sideways |
Store vertically and on doors |
|
L-shaped kitchen |
Dead corner swallows items |
Add a carousel or corner pull-out |
|
U-shaped kitchen |
Two corners lost to depth |
Pull-outs plus rotating carousels |
|
Open-plan kitchen |
Everything shows from the living area |
Concealed, closed storage |
|
Rental kitchen |
You can’t drill or install |
Removable, freestanding pieces |
|
Small apartment kitchen |
Too little of everything |
Multifunction, mobile furniture |
A rental kitchen ties your hands, but you still have options. You just can’t drill, screw, or make permanent changes. So lean on things you can take with you. Tension rods hold spray bottles under the sink. Adhesive hooks grab utensils on a wall. Freestanding shelves and a rolling cart add storage without touching the cabinets.
The trick with rentals is choosing pieces that move out as easily as they moved in. Skip anything that leaves marks or holes. When you leave, you pack your storage and take it to the next place. That saves your deposit and your money.
Small apartment kitchens fight the hardest battle, because they lack counter, cabinet, and floor space all at once. Here, every piece should earn its spot by doing two jobs. A rolling island gives you prep space and hidden storage, then tucks away when you’re done. A folding cart opens up for a dinner party and collapses flat after. Even a stool can double as a storage box.
Go vertical wherever you can too. Walls, door backs, and the sides of cabinets all hold weight a small kitchen can’t spare on the floor. When your footprint is tiny, the space above and beside you becomes your best friend.
For L-shaped and U-shaped kitchens, the corners are where you win or lose. Left alone, they hide items your arm can’t reach. A rotating carousel or a pull-out corner rack brings that space back into play, and suddenly a “small” kitchen holds far more than you thought.
How to Choose Organizers That Fit Your Space
The wrong organizer costs you twice: once at the store, and again when it sits unused in a closet. I’ve watched people buy beautiful bins that never fit a single cabinet. A few simple rules keep you from that trap.
Measure before you buy anything
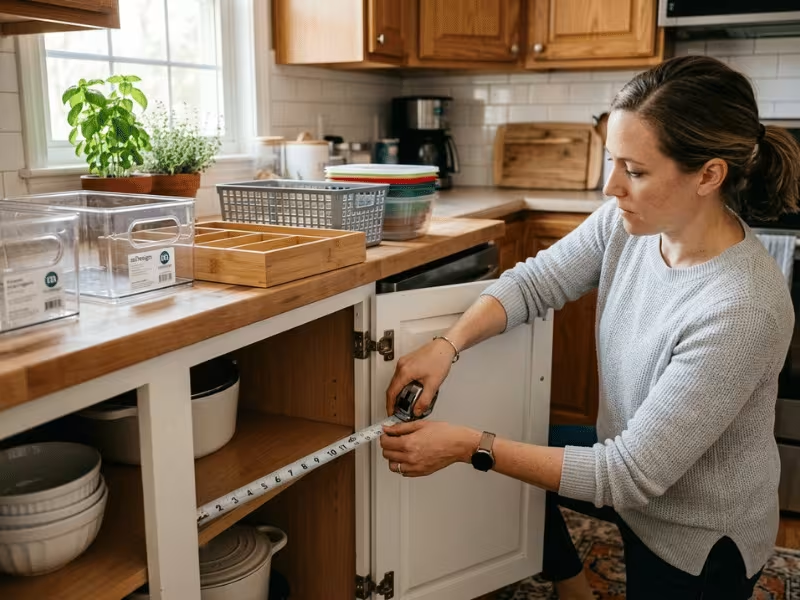
Pull out a tape measure first. Every time. Write down four numbers for each spot: width, depth, height, and door clearance.
That last one trips people up the most. A drawer organizer might fit the drawer perfectly, yet block the door from closing. Check the swing and the clearance before you spend a cent.
Match the organizer to how you use the space
Once you have your numbers, pick the type that fits your habits, not the trend.
|
If you need… |
Choose… |
Avoid… |
|---|---|---|
|
To see contents fast |
Clear containers |
Opaque bins for daily items |
|
Flexibility as your stock changes |
Stackable pieces |
Fixed, one-shape units |
|
A setup you might rearrange |
Adjustable organizers |
Custom-fit builds |
Clear containers win for anything you reach for often. You spot the level at a glance and stop overbuying. Save opaque bins for backup stock or ugly clutter you’d rather hide.
Stackable beats fixed when your inventory shifts with the seasons. You add or remove layers as needed. Fixed units lock you into one shape forever.
And for most people, adjustable beats custom-fit. Custom looks great until you move or rearrange. Adjustable pieces follow you and adapt to the next kitchen.
Pick the right material for the job
Material matters more than people think. Each one has a job it does best.
- Wire for airflow. Great for produce and anything that needs to breathe.
- Plastic for lightweight items. Cheap, washable, and easy to move.
- Bamboo for dry goods and a clean look. It handles grains and pantry staples well.
- Metal for heavy pots and pans. It holds real weight without bending.
Put a stack of cast iron on a flimsy plastic rack and you’ll hear it crack within a week. Match the strength to the load. For everyday accessories that sit out on the counter or table, a curated set of tabletop supplies keeps materials consistent and easy to clean.
Test one piece before you commit
Here’s the habit that saves the most money. Never buy a full matching set on the first trip.
Buy one piece. Bring it home. Slide it into the actual cabinet and live with it for a few days. If it fits and earns its spot, go back for the rest.
That single test beats returning a whole box of bins that never fit.
Low-Cost Fixes First, Then Decide If Built-Ins Are Worth It
Start cheap. Most kitchens improve fast with small, low-cost fixes, and you learn what your space really needs before spending real money.
But cheap only works when it fits how you cook. A bargain organizer that sits in the wrong spot just adds clutter. So match each fix to a real problem, not to its price tag.
A few simple pieces solve most everyday headaches:
- Tension rods hold spray bottles under the sink, so they hang instead of tipping over.
- Bins group loose snacks or backup jars, but only where you actually reach for that category.
- Magazine file dividers stand cutting boards and trays upright, turning a messy stack into slots.
- Hooks grab measuring cups and mugs on a door or wall you weren’t using.
- Reused glass jars store dry goods and let you see levels, so you stop overbuying.
Notice the pattern. Each one earns its spot because it fixes a specific pain, not because it costs a few dollars. If a fix doesn’t match your workflow, skip it. A cheap tool in the wrong place still wastes space.
Live with these fixes for a few weeks. They’ll show you exactly where your storage still falls short.
That’s when built-ins start to make sense. They cost more, so save them for the problems the cheap fixes can’t solve.
Built-ins pay off best in three cases. You plan to stay in the home for years. The layout already works well. And storage is the only thing holding the kitchen back.
When all three line up, the right build changes daily life:
- Pull-outs bring deep base cabinets forward, so nothing hides at the back.
- Toe-kick drawers turn the dead strip under your cabinets into flat storage for trays.
- Appliance garages clear the counter while keeping tools plugged in.
- Custom pantry shelving fits odd gaps that standard shelves waste.
The rule stays simple. Try the cheapest effective fix first. Then invest only where access and capacity truly improve. Spend money on the problems that survive the easy solutions.
Common Kitchen Storage Mistakes That Waste Space
I see the same mistakes in kitchen after kitchen. They feel small, but each one quietly eats space you already have. Fix these six, and your kitchen opens up before you buy a thing.
- Buying organizers before measuring. This is the costliest habit of all. You grab a bin that looks perfect, bring it home, and it blocks the door or won’t slide in. Now you’ve spent money on clutter. Measure width, depth, height, and door clearance first, every time.
- Giving prime space to rarely used items. Your eye-level shelves are gold. When a fondue set you use once a year sits there, your daily plates end up somewhere awkward. Swap them. Prime space belongs to the things you reach for every day.
- Filling every empty space just because it’s there. An empty spot isn’t a problem to solve. Cram it full, and you lose the breathing room that keeps a kitchen usable. Leave some gaps so you can actually see and reach what you own.
- Ignoring depth in lower cabinets. Deep base cabinets hold plenty, but the back turns into a black hole. Pots vanish for months. Without a pull-out or sliding basket, you’re paying for storage you never touch.
- Using opaque containers for frequently used food. You can’t see what’s inside, so you forget it exists. Then you buy a third bag of flour you didn’t need. Clear containers for everyday items stop the waste and the overbuying.
- Skipping labels where categories matter. Without labels, a shared pantry falls apart fast. Family members guess, misplace things, and the system you built collapses in a week. A quick label keeps each category in its place.
Walk your kitchen and check for these six. Most take minutes to fix, and they hand back space you thought you’d lost.
Quick Answers to Common Kitchen Storage Questions
How do I store more in a small kitchen without remodeling?
Go vertical and use the space you’re ignoring. Add risers inside cabinets, hang utensils on wall rails, and mount racks on door backs. Group items by how often you use them, then give the easiest spots to your daily gear.
What’s the best way to organize deep cabinets?
Bring the back forward. A pull-out drawer or sliding basket slides the whole shelf out to meet you, so nothing hides in the dark. Add a two-tier version to use the full height instead of just the front strip.
Are pull-out drawers worth the money?
Yes, if the layout works and you’ll stay in the home a while. They turn a dead cabinet back into usable space and save your knees. For deep base cabinets you dig through daily, they pay off fast.
How do I organize a corner cabinet that’s hard to reach?
Use movement, not more bins. A two-tier lazy Susan spins the back around to the front with a small turn. For odd angles, a pie-cut carousel or a pull-out corner rack swings the whole shelf out toward you.
What should I keep on my kitchen countertops?
Only your three or four most-used items. The coffee maker, a knife block, maybe a cutting board. Everything else goes in a cabinet or behind an appliance garage. Protect that open counter, because you need it to actually cook.
How can I add storage in a rental kitchen?
Lean on pieces you can take with you. Tension rods hold bottles under the sink. Adhesive hooks grab utensils. A rolling cart and freestanding shelves add room without a single hole. Choose anything that moves out as easily as it moved in.
Final Thoughts
Don’t try to fix the whole kitchen at once. Pick one zone and start there. A single win builds momentum for the rest.
Before you buy anything, measure. Width, depth, height, and door clearance. Those four numbers save you from wasted purchases.
Then fix access before you add containers. Pull the back forward, spin the corners out, and give daily items the easy spots.
Save your money for last. Let the cheap fixes show you what your space truly needs, then invest only where access and capacity really improve.
Work in that order, and your kitchen starts working with you.